

Uploading files -especially pictures- to applications is far from trivial these days. It’s safe to say that nearly every website includes some kind of file upload feature. Implementing file uploads -and handling their storage- used to be a special kind of nightmare. We had to craft specific forms, write complex algorithms to store files in a logical structure for easy identification and to prevent naming collisions, and handle metadata collection… I was there. It wasn’t that long ago.
As usual, Rails offers a simple yet powerful solution to this challenge: Active Storage. Active Storage is a built-in library for managing file uploads. It’s a true gem that handles the entire process -uploading, identifying, storing, and retrieving files- whether on local disks or cloud services like Amazon S3, Microsoft Azure, and Google Cloud Storage.
In the previous section… Creating, Reading, Updating, and Deleting Data with Rails
- Today you’re going to breathe a sigh of relief while implementing file uploads.
- You’ll learn how to validate uploaded files.
- You’ll see how to use the local file system as storage.
- Even better: you’ll learn how to create a production-grade solution using Amazon S3.
- As a bonus, I’ll show you how to mock S3 operations with a local service.
Adding file upload option
We’ve done a good job so far. Our digital library, Railsdex, already manages all the Pokémon details collected by the trainer. But something’s missing… as the old saying goes, a picture is worth a thousand words. It’s time to give our app the ability to upload a nice image of those cute monsters.

Install Active Storage
First things first: We need to install Active Storage in our application. Open a terminal at your project root and run:rails active_storage:install
As quick as it is simple, Rails generates a migration file that sets up Active Storage. This migration creates the necessary database structure to store file metadata and associate uploaded files with model records. ![]()
Curious? Take a look at /db/migrate/*create_active_storage_tables_active_storage.rb.
Since this is a database change, apply the migration by running:rails db:migrate
A few lines later, Active Storage is ready to shine!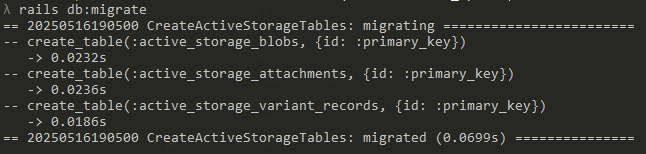
Implement a picture upload on Add new Pokémon
The new Pokémon page needs to be updated with an option to upload a picture. Let’s start by editing the view /app/views/pokemons/new.html.erb:
Enable the form to support file upload
Update the form_with helper to include the option html: { multipart: true }. Your code should look like:
<%= form_with model: @pokemon, local: true, html: { multipart: true } do |form| %>
Include file upload field
right after the captured field and before the submit button, add:
<div class="file-upload">
  <%= form.label :picture, "Upload the picture" %>
  <%= form.file_field :picture, id: "pokemon-picture", accept: "image/png,image/jpeg" %>
  <label for="pokemon-picture" class="custom-file-button"><span>Choose picture</span></label>
  <span class="file-name">No picture chosen</span>
</div>
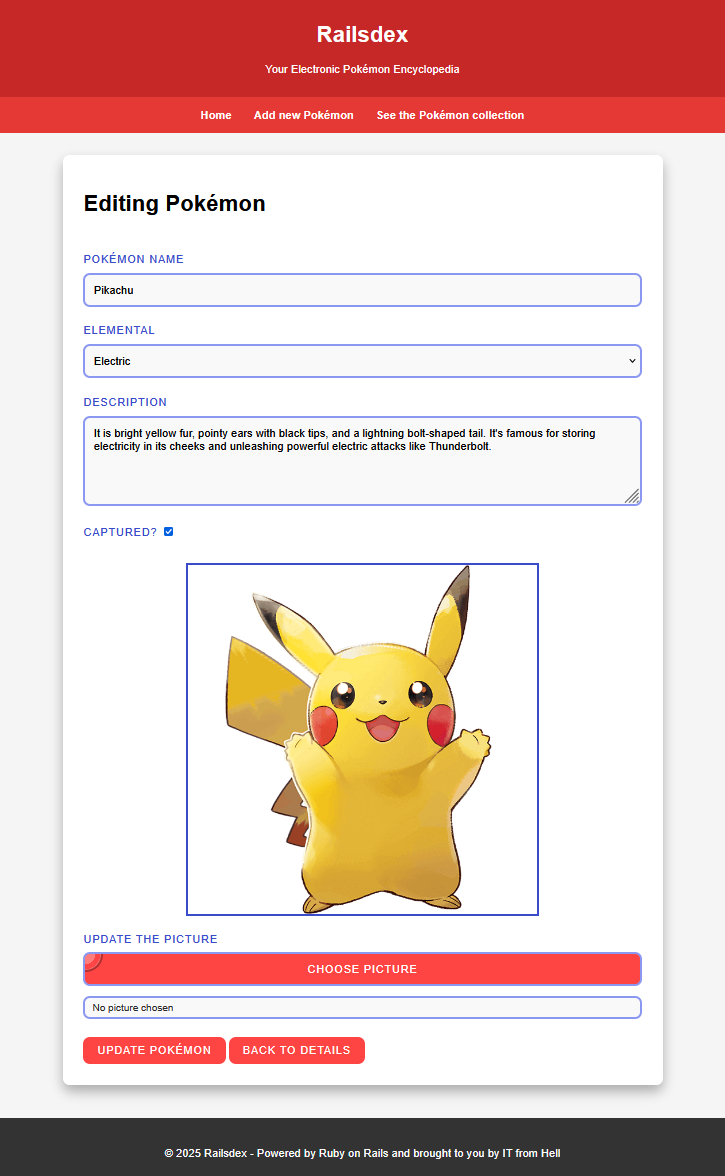
Implement a picture upload on Edit this Pokémon
Edit the view /app/views/pokemons/edit.html.erb:
Enable the form to support file upload
Same as before, edit form_with and add the option html: { multipart: true }:
<%= form_with model: @pokemon, local: true, html: { multipart: true } do |form| %>
Include file upload field
This time with a small conditional twist to show the current picture, add this after captured and before submit button:
<div class="file-upload">
  <% if @pokemon.picture.attached? %>
    <div class="current-picture">
      <%= image_tag @pokemon.picture %>
    </div>
  <% end %>
  <%= form.label :picture, (@pokemon.picture.attached? ? "Update" : "Upload") + " the picture" %>
  <%= form.file_field :picture, id: "pokemon-picture", accept: "image/png,image/jpeg" %>
  <label for="pokemon-picture" class="custom-file-button"><span>Choose picture</span></label>
  <span class="file-name">No picture chosen</span>
</div>
Implement the view of uploaded picture on Show details
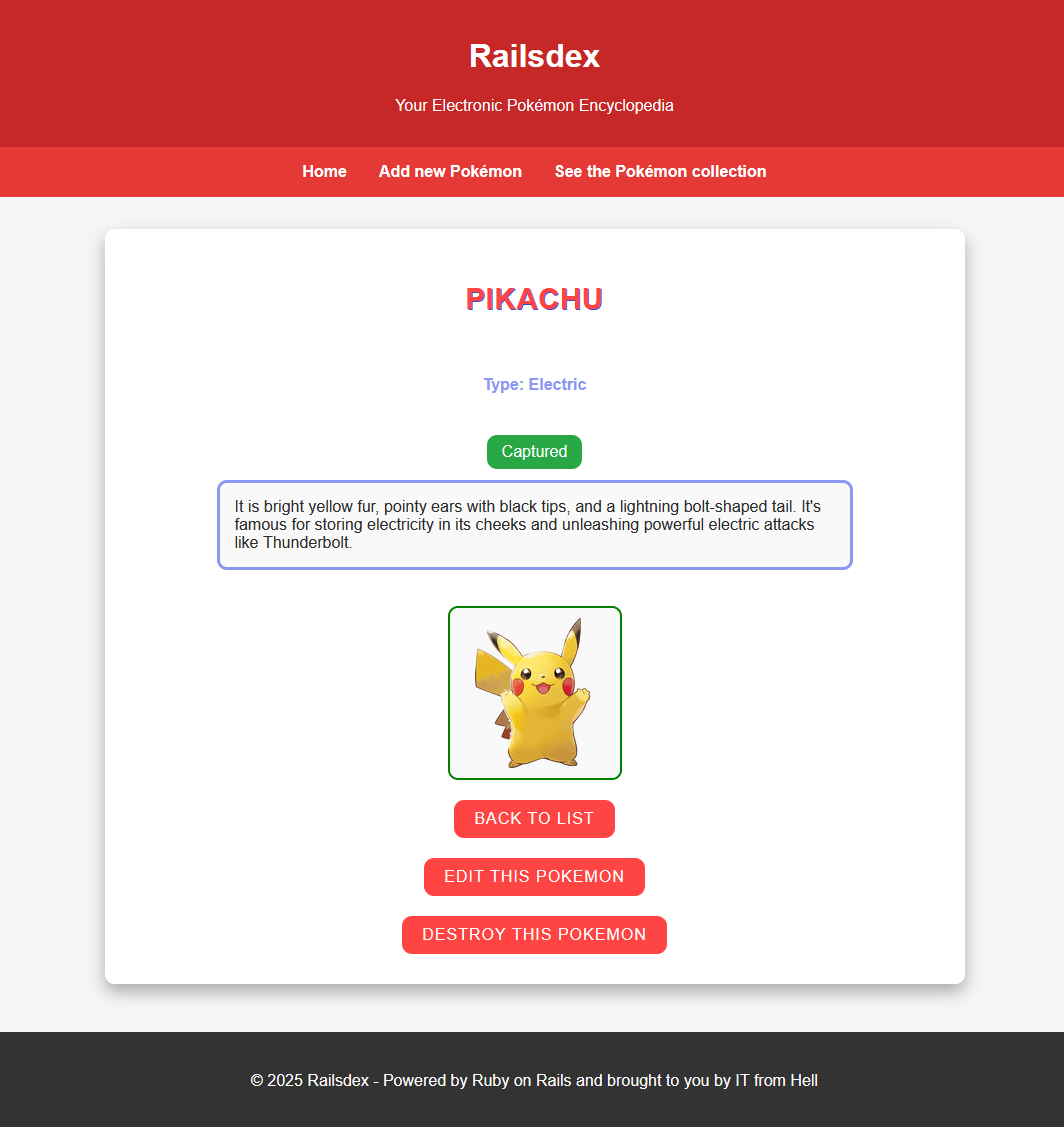
Open to edit view /app/views/pokemons/show.html.erb and add this after description:
<% if @pokemon.picture.attached? %>
  <%= image_tag @pokemon.picture, style: @pokemon.captured? ? "border: 2px solid green;" : "border: 2px solid red;" %>
<% end %>
Allow a picture to be uploaded
We’ve added the picture field to our form, but the controller needs to permit it in the incoming request.
Edit controller /app/controllers/pokemons_controller.rb and add :picture among the accepted list of parameters. At line 72 you should have this:
params.expect(pokemon: [ :name, :description, :captured, :elemental_type_id, :picture ])
Link picture and Pokémon
Finally, we need to link the Pokémon with its uploaded picture. We do this editing the model located at /app/models/pokemon.rb. Add this line before keyword belongs_to:
has_one_attached :picture
At this point of the implementation, the functionality is ready to run. Time to run the server rails server.
Things should work -but the UI might be a bit messy. Let’s fix that.
Update the look & feel
Matter of style
Open /app/assets/stylesheets/application.css and add styles from below (recommended around line 180 to keep it tidy).
Stylesheet
/* File Upload */
.file-upload {
    position: relative;
    display: flex;
    flex-direction: column;
    gap: 10px;
    margin: 10px 0 25px 0;
}

.file-upload label {
    font-size: 1rem;
    color: #3b4cca;
    text-transform: uppercase;
    letter-spacing: 1px;
    font-family: 'Press Start 2P', Arial, sans-serif;
}

.file-upload input[type="file"] {
    display: none; /* Hide default file input */
}

.file-upload .custom-file-button {
    display: inline-block;
    padding: 12px 20px;
    font-size: 1rem;
    background: #ff4444;
    color: #ffffff;
    border: 3px solid #8b98f2;
    border-radius: 10px;
    cursor: pointer;
    text-transform: uppercase;
    letter-spacing: 1px;
    transition: background 0.3s ease, transform 0.2s ease, border-color 0.3s ease;
    font-family: 'Press Start 2P', Arial, sans-serif;
    text-align: center;
    position: relative;
    overflow: hidden;
}

.file-upload .custom-file-button:hover {
    background: #3b4cca;
    border-color: #ffcb05;
    transform: scale(1.05);
}

.file-upload .custom-file-button:active {
    transform: scale(0.95);
}

.file-upload .custom-file-button:focus {
    outline: none;
    border-color: #ffcb05;
    box-shadow: 0 0 8px rgba(255, 203, 5, 0.5);
}

.file-upload .custom-file-button::before {
    content: '';
    position: absolute;
    width: 50px;
    height: 50px;
    background: radial-gradient(circle, #ffffff 40%, #ff4444 40%, #ff4444 60%, #ffffff 60%, #000000 65%);
    border-radius: 50%;
    top: -25px;
    left: -25px;
    opacity: 0.3;
    z-index: 0;
}

.file-upload .custom-file-button span {
    position: relative;
    z-index: 1; /* Ensure text is above the ::before */
}

.file-upload .file-name {
    font-size: 0.9rem;
    color: #2c2c2c;
    font-family: Arial, sans-serif;
    margin-top: 5px;
    padding: 5px 10px;
    background: #f9f9f9;
    border: 3px solid #8b98f2;
    border-radius: 10px;
    z-index: 1;
    position: relative;
}

/* Current picture */
.current-picture {
  margin-top: 10px;
  text-align: center;
}

.current-picture img {
    width: 500px;
    height: 500px;
    object-fit: contain;
    margin-bottom: 10px;
    border: 3px solid #3b4cca;
    z-index: 1;
    position: relative;
}

.current-picture p {
  font-size: 1rem;
  color: #3b4cca;
  text-transform: uppercase;
  letter-spacing: 1px;
  font-family: 'Press Start 2P', Arial, sans-serif;
  margin-bottom: 10px;
}
Make file selection user-friendly
A last nice touch is done including a short Javascript. This will display the file name after selection. Add the code below to file /app/javascript/application.js:
Javascript
// Add filename when selected to upload the Pokémon picture
document.addEventListener('DOMContentLoaded', () => {
    document.querySelectorAll('.file-upload input[type="file"]').forEach(input => {
        input.addEventListener('change', function () {
            this.nextElementSibling.nextElementSibling.textContent = this.files.length > 0 ? this.files[0].name : 'No picture chosen';
        });
    });
});
Precompile assets and see the results
We are one step from checking the final result. Since we changed the styling, run:rails assets:precompile
Then launch your server again:rails server
Everything should look much better now!

Validating the uploaded file
At this point, users can upload anything -including PDFs, ZIPs, or videos. That’s not ideal! It’s time for validations, baby!
active_storage_validationsis a gem specialized in validating Active Storage attachments. When enabled, it helps us to enforce rules such as content type, file size, image or video dimensions and aspect ratio, audio or video duration, and more.
Install active_storage_validations
Let’s start editing our source of true gems, easy to find at /Gemfile. Add the following:
# Active Storage validation
gem "active_storage_validations"
Open a terminal (or use the one on hand) and run the command:bundle install
Faster than a blink of an eye you got it:
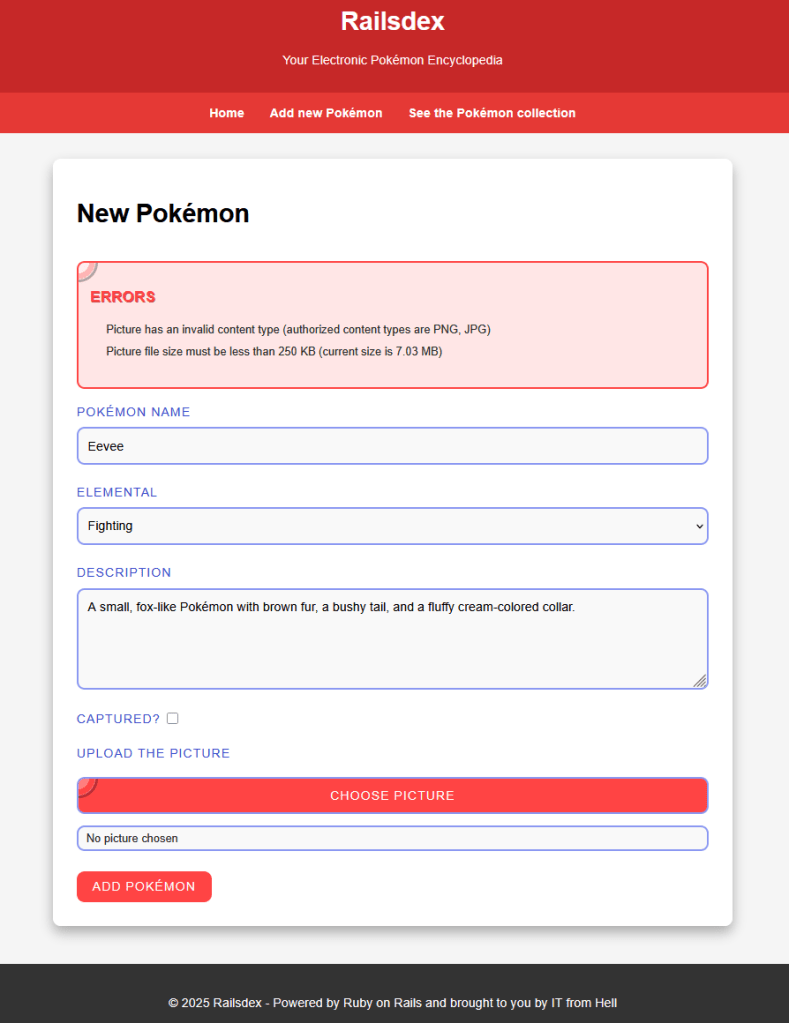
Implement the file upload validation
Now that we have active_storage_validations ready, it wouldn’t be easier to validate uploaded picture. Railsdex will only allow:
- Image file of types PNG and JPEG.
- File size no larger than 250 KB.
A validation is applied against the model which that attribute is part. Therefore, we need to edit the model located at /app/models/pokemon.rb, and after the keyword validates, add:
# File must be an image of type either PNG or JPEG not larger than 250 KB
validates :picture, content_type: ["image/png", "image/jpeg"], size: { less_than: 250.kilobytes }
Check it
Start the application rails server. Now try uploading different file types and sizes -it just works.
Understanding default storage (local file system)
By default, Active Storage uses the local disk as storage, and organize all the uploaded files under location /storage . This behaviour is configured in /config/storage.yml:
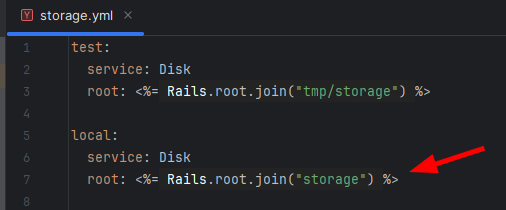
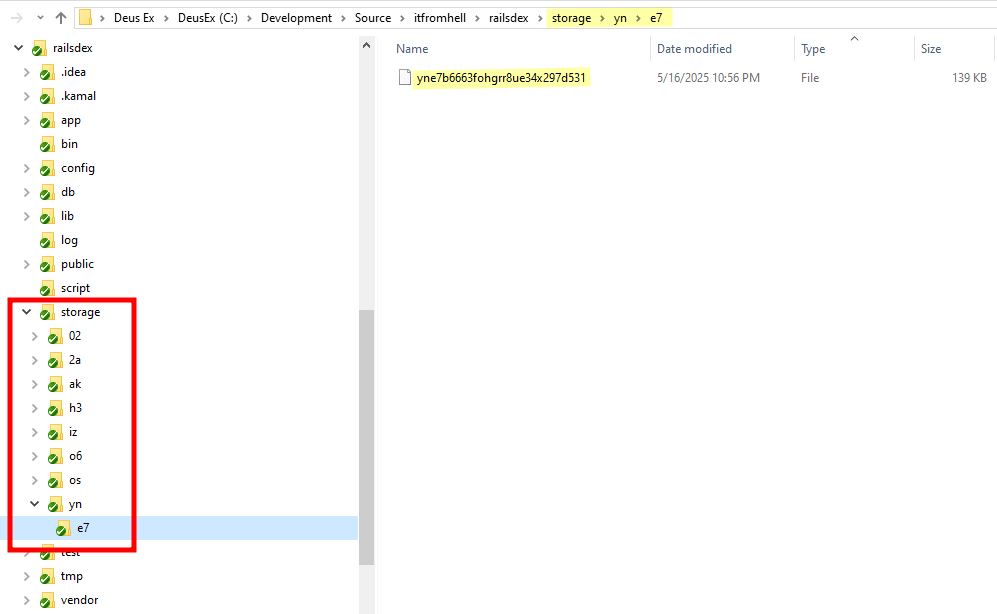
Files are stored under nested subdirectories using two-character segments from the file’s unique key.
You can see these keys in the active_storage_blobs database table:
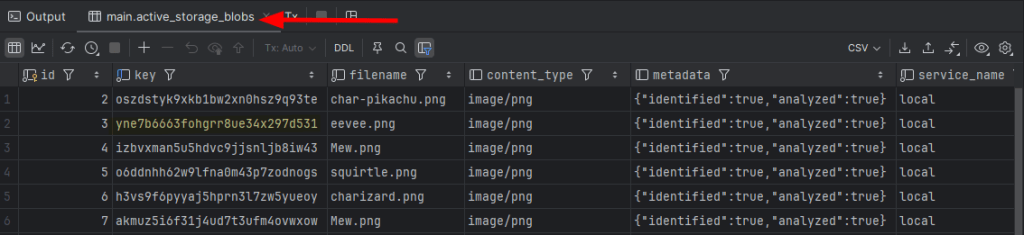
This is a kind of simple and reliable solution. The kind that has been around for decades. However, it is not easily scalable, it is hard to maintain, and not secure as anyone with access to the disk is able to browse those files.
Using Amazon S3
Now we’re getting serious.

Amazon S3 is a well known cloud object storage service that allows you to store and retrieve files from anywhere, anytime, in many different ways.
Install aws-sdk-s3
The way to make your Rails application to talk with Amazon S3 is using their official Amazon Web Services (AWS) Software Development Kit (SDK) module for S3.
Well, we have been here before… edit /Gemfile and add the following:
# Amazon S3 adapter
gem 'aws-sdk-s3', '~> 1.142'
Then run:bundle install
Configure the adapter
If you already have an AWS account and S3 bucket, skip ahead.
Amazon S3 does not offer free access to their services -which is understandable. However, you can create an account using the AWS Free Tier, which is more than suficient for learning purposes. Please follow the official guide to create your AWS S3 account and return when you’re ready to continue.
You’ll need:
- Access key ID
- Secret access key
- AWS region
- S3 bucket name
Remember that Rails storage’s configuration is found in /config/storage.yml, so lets edit the file to add the following:
amazon:
  service: S3
  access_key_id: YOUR_ACCESS_KEY_ID
  secret_access_key: YOUR_SECRET_ACCESS_KEY
  region: AWS_REGION
  bucket: YOUR_BUCKET
  request_checksum_calculation: "when_required"
  response_checksum_validation: "when_required"
While the four first parameters are kind of self-explanatory, the last two options –request_checksum_calculation and response_checksum_validation – are important for avoiding checksum errors introduced in newer AWS SDK versions. Setting these parameters ensures that checksum validation is enforced only when required by the operation, which can help prevent common issues with data integrity checks -believe me when I say that this tip is going to save you a lot of headaches.
Now, we need to tell Active Storage to use Amazon S3 instead of the local disk. This is done editing the file /config/environments/development.rb and changing the parameter config.active_storage.service to value :amazon, just like below:
config.active_storage.service = :amazon
Test it
Start the application rails server and upload a new picture. Check the Rails server output, you will notice something similar to below:

Also, check for that file key in you Amazon S3 bucket, you should see it there:
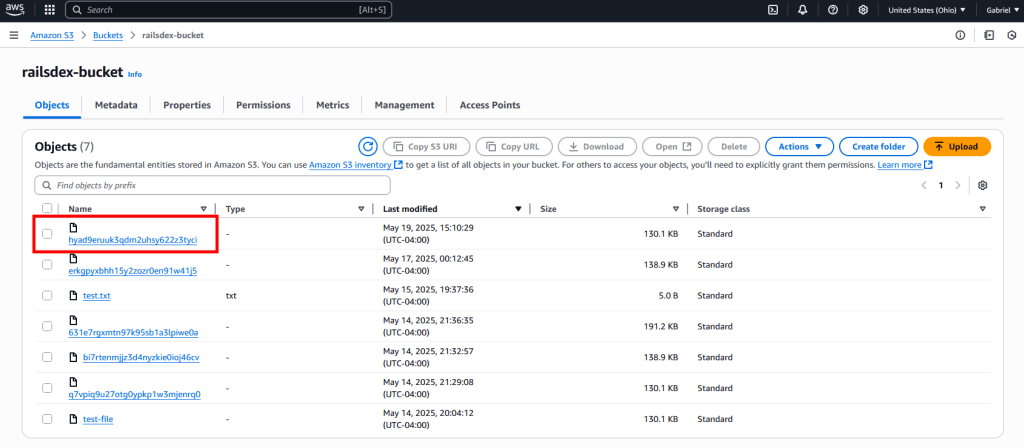
Well done! Railsdex is successfully configured to use Amazon S3 as storage for Pokémons pictures.
Using LocalStack to emulate S3 service
Amazon S3 is the go-to solution for real-world applications. However, when you only need to test your application and cannot use Amazon AWS -perhaps due to cost or credit card requirements- LocalStack is an excellent alternative. LocalStack is an open-source AWS emulator that can act as a mock for many AWS services, including S3. It is free to use and does not require real AWS credentials, making it ideal for developing and testing applications that integrate with S3
Personally, I prefer to include LocalStack as part of a Docker Compose configuration, alongside other services required for application development. This is the setup I’ll describe below. Of course, there are other ways to integrate LocalStack into your development environment.
Docker Compose
This configuration runs LocalStack as part of a multi-container application project. With this setup, you will:
- have persistent data;
- LocalStack container will have a static IP address (which is needed for reverse proxying);
- an initialization script will automatically handle S3 bucket creation.
Here’s the sample configuration:
s3:
  image: localstack/localstack:latest
  container_name: railsdex_s3
  restart: unless-stopped
  environment:
    # Specify AWS services to emulate
    SERVICES: s3
    AWS_DEFAULT_REGION: AWS_REGION
    # 0 = Disables persistence, so all data is discarded when the instance terminates. 1 = Enables persistence across restarts.
    PERSISTENCE: 1
    # DEBUG: 1
    # LS_LOG: debug
  ports:
    - "4566:4566"
    - "4510-4559:4510-4559"
  volumes:
    # Persistent data
    - ./localstack/data:/var/localstack
    # Mounts the initialization script to create resources
    - ./localstack/init-aws.sh:/etc/localstack/init/ready.d/init-aws.sh
  networks:
    app_network:
      ipv4_address: 10.0.5.5
Bucket initialization
To have your bucket created as soon as the LocalStack instance is started, save the following as /localstack/init-aws.sh :
#!/bin/bash
# Create an S3 bucket
awslocal s3 mb s3://railsdex-bucket
Rails configuration
Edit /config/storage.yml to include two other parameters to amazon. Your configuration should be like:
amazon:
  service: S3
  access_key_id: YOUR_ACCESS_KEY_ID
  secret_access_key: YOUR_SECRET_ACCESS_KEY
  region: AWS_REGION
  bucket: YOUR_BUCKET
  request_checksum_calculation: "when_required"
  response_checksum_validation: "when_required"
  endpoint: http://localstack:4566
  force_path_style: true
endpoint: Points the S3 client to LocalStack.force_path_style: Ensures compatibility with the mock service.
That’s all folks! You now have a fully functional file upload feature in your Ruby on Rails app -with validation, local and cloud storage support, and even a mock option for development.
Source code and live application

You can find the full and functional source code for this post on GitHub.
Check it out at github.com/gabrielstelmach/itfromhell/railsdex.
Curious to see Railsdex in action? Catch it live here:
railsdex.itfromhell.net

Leave a comment