

Creating an application from scratch with Ruby on Rails is the practical confirmation of Matz dreams and David Hansson goals. It is simple, quick, and kind of fun!
In the previous section… Installing Ruby on Rails
Today we are going to have a functional Ruby on Rails application.
Preface
My son loves Pokémon. He has been following the TV show for years and has covered almost all the movies released so far. Also, he collects cards, plays board-games, video-games, and he is up for pretty much everything related to that particular universe. While I’m not an expert in this curious world, sharing his adventures has taught me a few things about the world of little cute monsters. In the Pokémon verse, they have a device called Pokédex. It is a handheld electronic encyclopedia designed to record data on the various Pokémon species encountered by a Trainer -that’s how is called a person who catches, raises, and cares for Pokémons.
So, why not match a well known theme like Pokémon with the need of applying the fresh learned knowledge on building an application, and at the same time staying tuned with a son’s passion. Sounds like hitting two (or more) birds with one stone.
The application that we’re going to build is a kind of Pokédex. During its development, features to manage Pokémon species, upload their pictures, and even to expose the collected data through API will be part of this very particular version of pocket monsters library.
Creating a New Application
Let’s get started. Open a command prompt, navigate to the place you want to keep the codebase and type: rails new railsdex
You have now a lot of lines running through your screen. These commands are responsible for creating the default file system structure, configuration files, and downloading all sort of dependencies needed to start the development: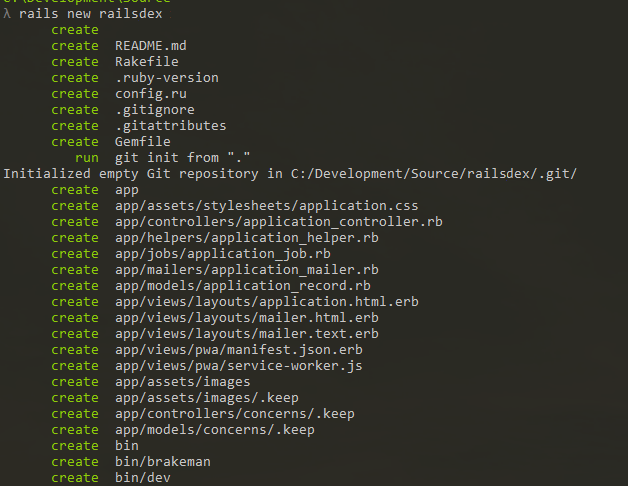
When the creation process is finished, you will see a file system structure like this:
Do you want to know more about
rails newcommand? Jump here for a detailed reference.
Running the Application
Using the same command prompt, navigate into the application directory railsdex and type:
rails server
And in the blink of an eye, you see: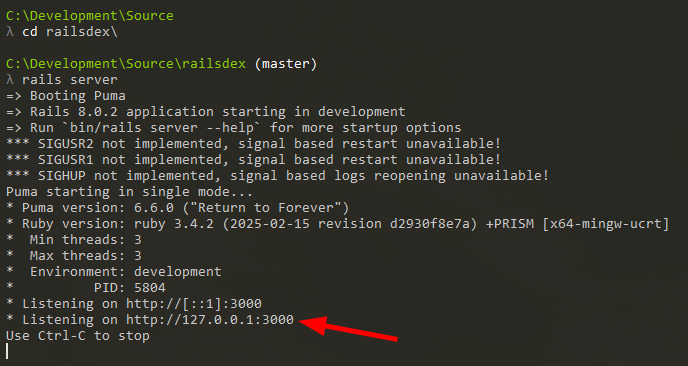
That means your shiny new application is now live on your local development server -nicely done!
Let’s have a look at this. Open your favourite web browser and navigate to http://localhost:3000
Voilà! Rails application is up and running: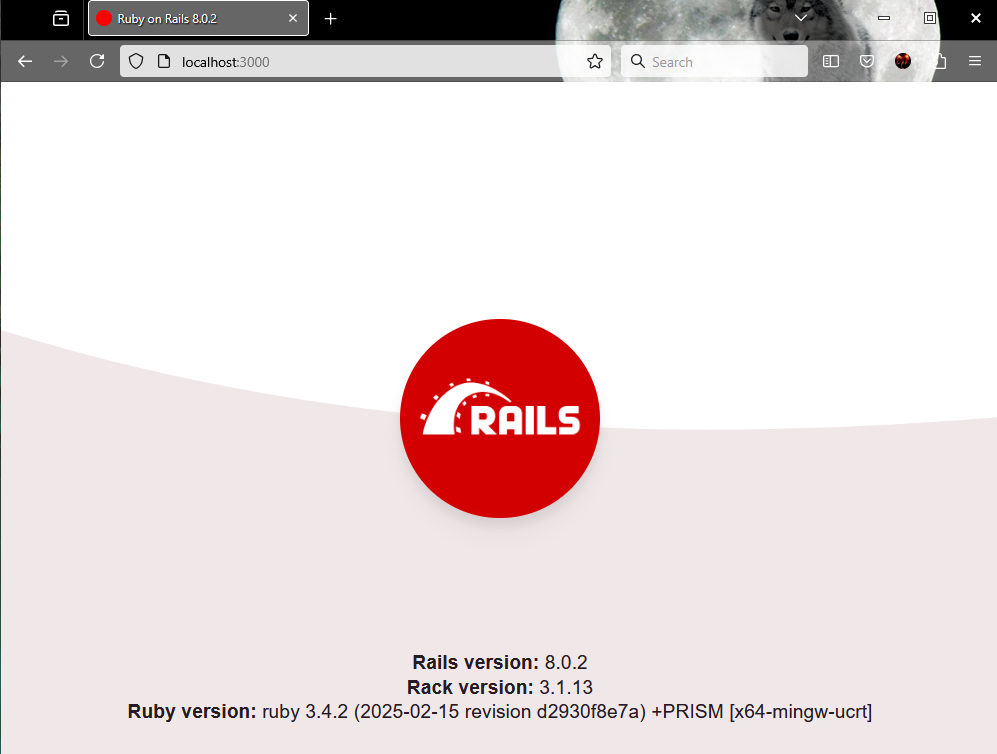
What you see here is the default front page of any new Rails application. It’s cheerful enough to greet you, but it looks nothing like the app we’re about to build. Time to change that.
Building a Home We Can Call Ours
If you are still running your application, exit Rails server pressing
CTRL+C
Create the view and controller
Using the command prompt (always handy to keep one open!), navigate to your application directory and create the Home page with the following command:
rails generate controller Home index
While the command runs, you’ll see Rails creating a few important components: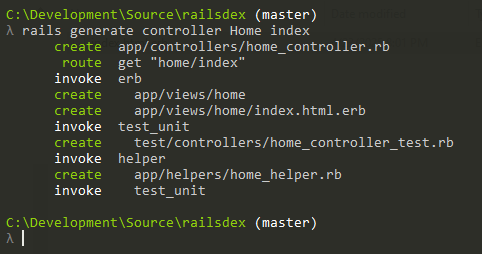
For more details about the command
rails generate controllercheck here
Apply the content and look & feel
Now, using your favourite IDE, open the view file located at /app/views/home/index.html.erb: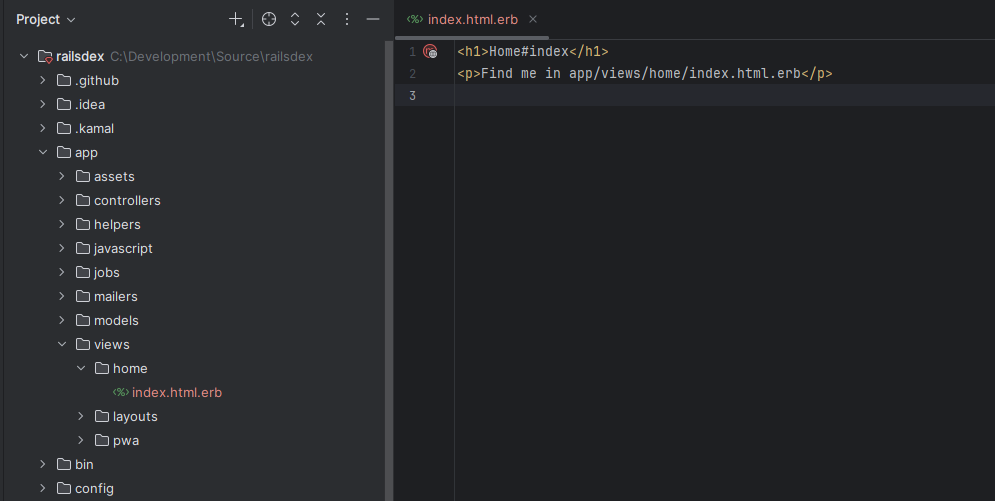
This is essentially just HTML, so we can feel free to get creative with it! Let’s give it a proper Railsdex makeover. Copy and paste the code below:
<%= image_tag "railsdex_home.jpg", class: "home-background" %>
Shared layout across the application is placed in /app/views/layouts/application.html.erb. Replace the contents inside tag <body> with:
<header>
<h1>Railsdex</h1>
<p>Your Electronic Pokémon Encyclopedia</p>
</header>
<nav>
<%= link_to "Home", root_path %>
</nav>
<main>
<%= yield %>
</main>
<footer>
<p>© 2025 Railsdex - Powered by Ruby on Rails and brought to you by <a href="https://itfromhell.net" target="_blank">IT from Hell</a></p>
</footer>
Rails is all about organization, and you will see how well every element in the development fits their purpose. Cut through the chase, and edit the CSS file located at /app/assets/stylesheets/application.css. Copy and paste the code below:
body {
    font-family: Arial, sans-serif;
    margin: 0;
    padding: 0;
    background-color: #f5f5f5;
}

header {
    background: #c62828;
    color: white;
    padding: 1rem;
    text-align: center;
}

nav {
    display: flex;
    justify-content: center;
    gap: 2rem;
    padding: 1rem;
    background: #e53935;
}
nav a {
    color: white;
    text-decoration: none;
    font-weight: bold;
}

main {
    max-width: 1200px;
    margin: 2rem auto;
    padding: 0 1rem;
}

footer {
    background: #333;
    color: white;
    text-align: center;
    padding: 1.5rem;
    margin-top: 3rem;
}
footer a {
    color: white;
    text-decoration: none;
}
footer a:visited {
    color: white;
}

.home-background {
    display: block;
    margin-top: -32px;
    margin-bottom: -48px;
    margin-left: auto;
    margin-right: auto;
    width: 75%;
}
Next, we’ll make the Home page the default page users see when they visit the app. To do that, open the configuration file responsible for routing all user requests. The name? routes.rb (aha!) it is located at /config/routes.rb: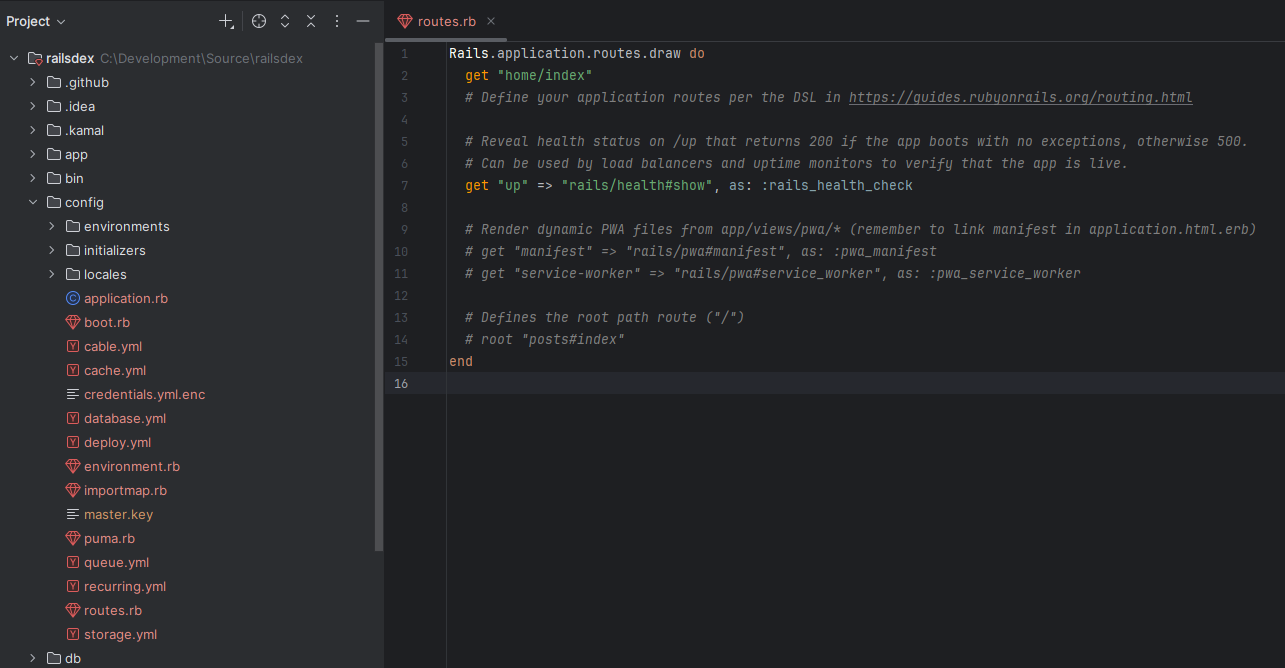
You’ll notice a line already in the file routing requests to our Home page -thanks to rails generate controller command. However, we want to make this page the first one users see, which, in routing terms, means setting it as the root page. To do that, add the following code just before the endkeyword:
root "home#index"
The final touch is adding the cute home picture in the right place. Download railsdex_home.jpg and save it to /app/assets/images/.
See everything together
Back to command prompt, start the application using:
rails server
Now, open your web browser and go to http://localhost:3000
Pat yourself on the back! You’ve just laid the foundation for a complete Ruby on Rails application. In the next station of our journey, we’ll start building out our Pokémon data models.
Knowing more about rails new
The command rails new my_app_name is a powerful and handy way to create a new Ruby on Rails application. There are defaults that fulfill common project needs and also many options to let you set the creation just to fit your requirements.
-c OPTION or --css=OPTIONIn Rails version 7+ the default approach is to use plain CSS managed by the asset pipeline without a preprocessor. You may choose a CSS processor using: tailwind, bootstrap, bulma, postcss, sass.
-d OPTION or --database=OPTIONBy default, the application will use a local instance of SQLite3. You may set it to sqlite3 (default), postgresql, mysql, oracle, sqlserver, etc.
-j OPTION or --javascript=OPTIONSet the JavaScript Bundler. Options are: importmap (default), webpack, esbuild, rollup, bun, etc.
-m OPTION or --template=OPTIONRails application templates are Ruby files containing commands for adding gems, initializers, and etc to your project.
-r OPTION or --rubby=OPTIONSpecify the Ruby binary version that should be used when creating the Rails application. Eg.: 3.2
--rc=OPTIONUse a custom .railsrc file containing extra configuration options for Rails command.
--no-rcSkip loading .railsrc file.
--apiCall it “API Mode” as it generates a toilered Rails project optimized for API applications and excluding views, assets, and some middleware.
-q or --quietSuppress progress status messages output.
-B or --skip-bundleWill skip running bundle install after creating the new application.
--skip-active-recordActive Record is the default ORM in Rails. This command will skip it and can be useful when you want to use other object mapping library like Mongoid (for MongoDB).
--skip-action-mailerAction Mailer allows you to send emails from your application. Use this option to skip that.
--skip-action-mailboxAction Mailbox is for receiving email from your application. Skip inbound email processing with this option.
--skip-action-textAction Text helps on displaying rich text content. It includes a WYSIWYG editor called Trix and other handy related features. This will skip the rich text editing.
--skip-active-jobActive Job is a framework designed for declaring background jobs and executing them on a queuing backend. Skip background job framework.
--skip-active-storageActive Storage facilitates uploading files to a cloud storage. Use this option to skip file upload and storage.
skip-action-cableAction Cable integrates WebSockets with the rest of the application. Use this option to skip WebSocket support.
--skip-bootsnapBootsnap is a library to make Rails bootup as fast as possible. This option will skip Bootsnap.
-G or --skip-gitSkip Git initialization and creation of .gitignore. Use this in case you don’t have Git installed in your local environment.
--skip-keepsSkip creation of .keep files used for empty directories.
-J or --skip-javascriptThis will exclude the default setup skipping JavaScript files.
--skip-springSpring application preloader is not available in Rails 8. Use this option to skip it when creating on Rails < 8.
--skip-system-testSkip the creation of /test/system directory and the system test files with related setup.
-T or --skip-testSkip the creation of /test directory and the generation of its tests for view helpers, mailers, and models.
For a full and up-to-date list of options, type
rails new --help
Examples
Create a new application called Backend App for API implementation only. Also set its database as MySQL and skip the creation of test files:
rails new backend_app --api --database=mysql --skip-test
Create a new application called Frontend App using the most popular CSS processor and JavaScript bundler:
rails new frontend_app --css=sass --javascript=webpack
Create a new application called Minimal and skipping many components:
rails new minimal --skip-action-mailer --skip-action-mailbox --skip-active-storage --skip-action-cable --skip-test
Knowing more about rails generate controller
You can think on this command as a really useful macro for automating a bunch of repetitive and boring tasks when creating a new page in Rails. However, all the actions performed by this command can be done manually. Here’s a breakdown of what happens when you run it:
- Create the Ruby class for this controller as
/app/controllers/controllername_controller.rb
Also, all the specified actions are included in the class as empty methods. - Create the view template for each specified action as
/app/views/controllername/actionname.html.erb
These templates are basically HTML contents tied to the their controllers. - Create the helper file as
/app/helpers/controllername_helper.rb
Helper files are modules that may contain methods used by their views. These methods can be called directly in view templates. - Create necessary routes in
/config/routes.rb
For each action a route is added linking requests and resources.
Basic usage
rails g controller or rails generate controller
rails generate controller ControllerName actionName1 actionName2 actionName3 ...
Options
--skip-routesThis will skip adding routes in /config/routes.rb.
--parent=ParentControllerThis command is available only on Rails 7.1+ and specify a parent controller class rather than using the default ApplicationController.
Namespaces
Also, you may generate a controller specifying its namespace. For example to set Books under Products, you run:
rails generate controller products/books index
This command will create Products::BooksController in /app/controllers/products/books_controller.rb and all the rest following this namespaced structure.
Source code and live application
You can find the full and functional source code for this post on GitHub.
Check it out at github.com/gabrielstelmach/itfromhell/railsdex.
Curious to see Railsdex in action? Catch it live here:
railsdex.itfromhell.net

Leave a comment